“
To give you a little background,
I have been a Cloud Solutions Architect
for 4+ years focusing on AWS Cloud.
“
Introduction🍃
Best tool for the job

diagrams.net (Previously called draw.io)
I have used this tool for 3 years, and diagrams.net never disappointed me. These are the top 3 reasons:
- Simple and straightforward to use
- Performance — doesn’t lag too much if I have many icons on the page
- Integration with cloud storage (GDrive, OneDrive, etc.)
I love simplicity with minimal configuration. With this, building a professional AWS architecture becomes way easier for me as long as I understand the steps to build it. I’ll give an example of how to build a three-tier web architecture on AWS.

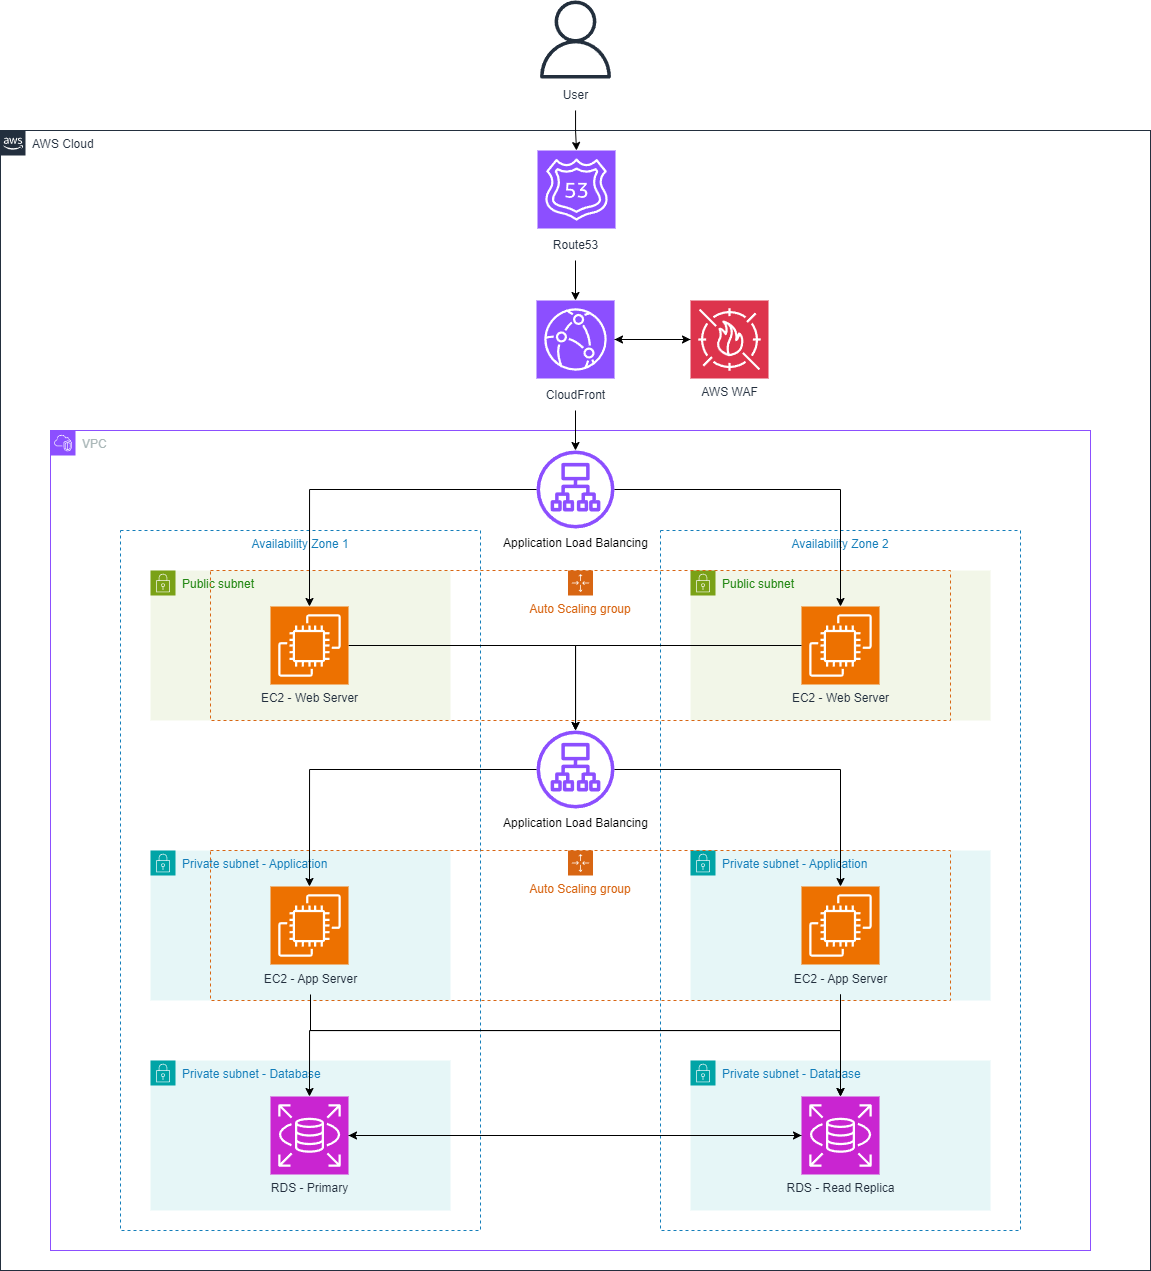
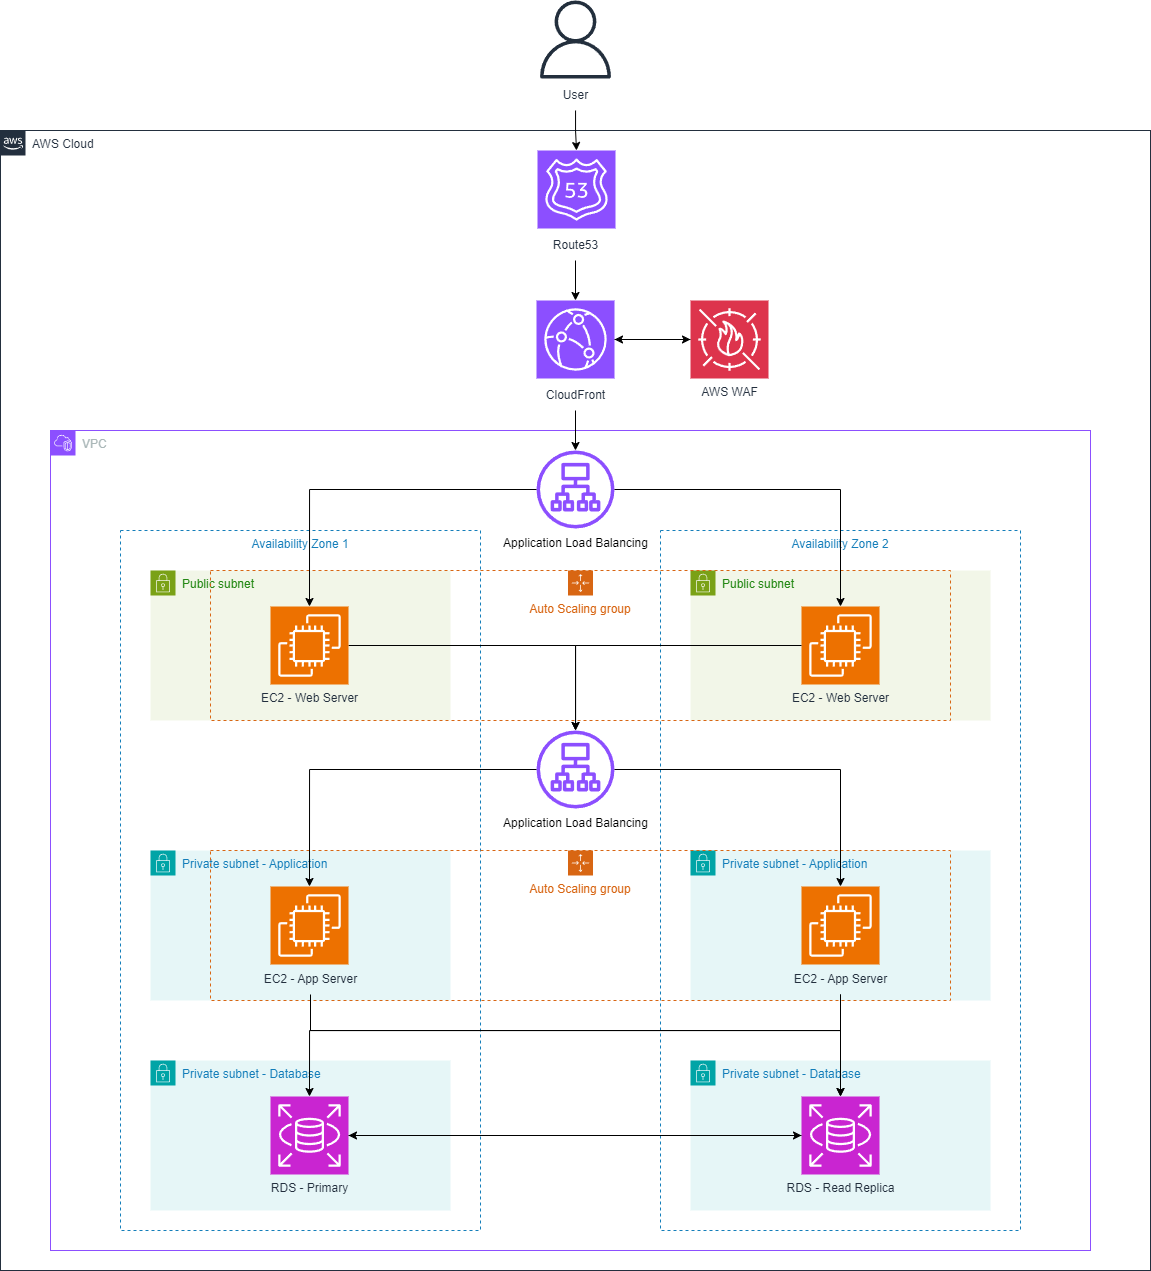
AWS Three-Tier Web Architecture — High Availability
Here is the end goal
Step 1: AWS Groups
“Always start with the AWS Groups, build the house first before putting in the furniture”
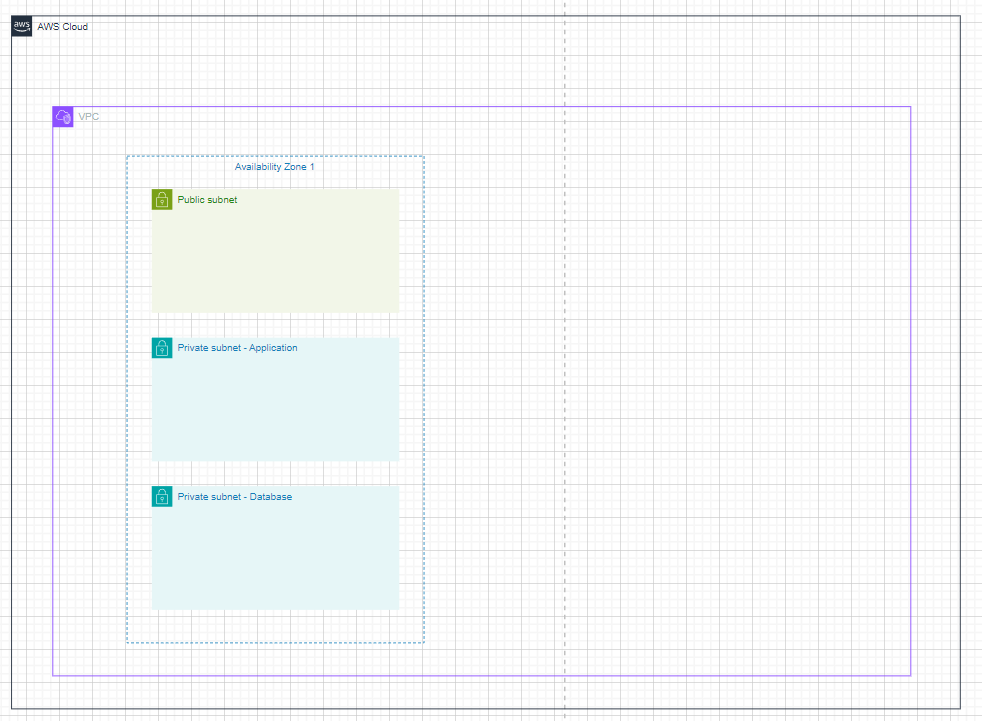
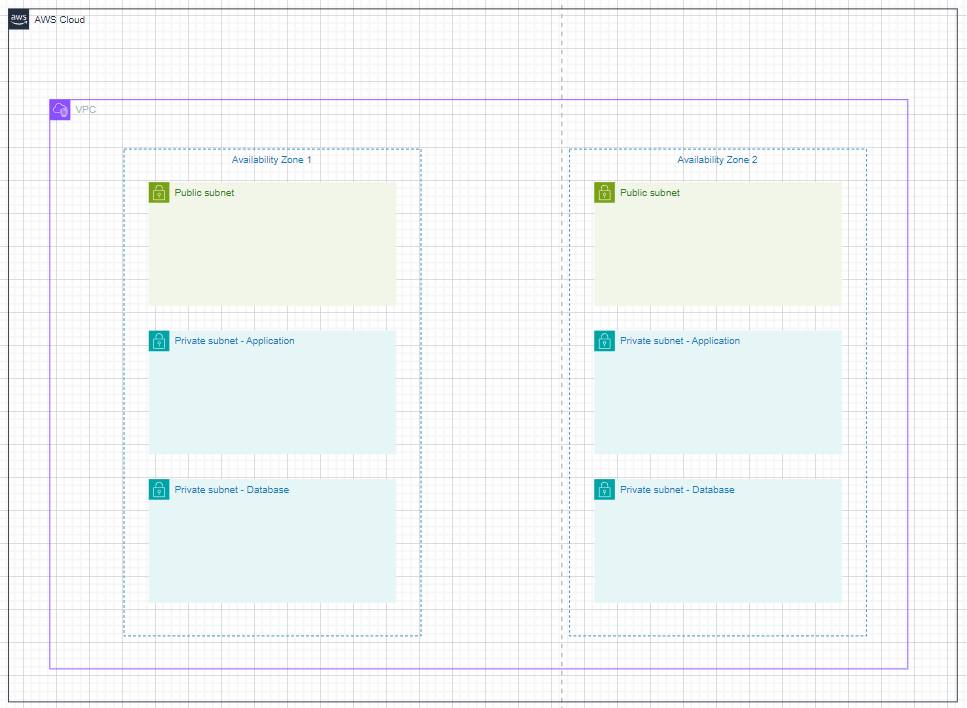
Before getting excited and putting any icons inside the draw.io page, it’s much better to build the template for easier management of the icons. Start from the AWS Groups.
- 1x “AWS Cloud” Group
- 1x “VPC” Group
- 2x “Availability Zone” Group
- 2x “Public Subnets” Group
- 4x “Private Subnets” Group (App and DB)
Always start by finishing one availability zone, and then we can just copy-paste the availability zone and rename the title. See below.
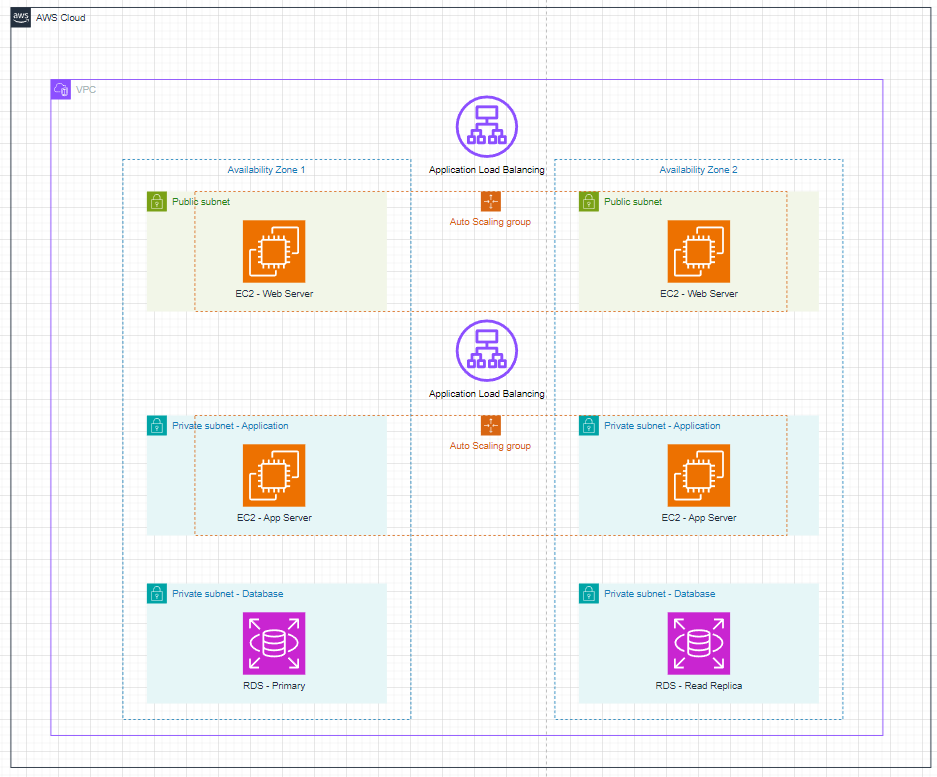
Step 2: AWS Icons — ALB and Auto Scaling Group
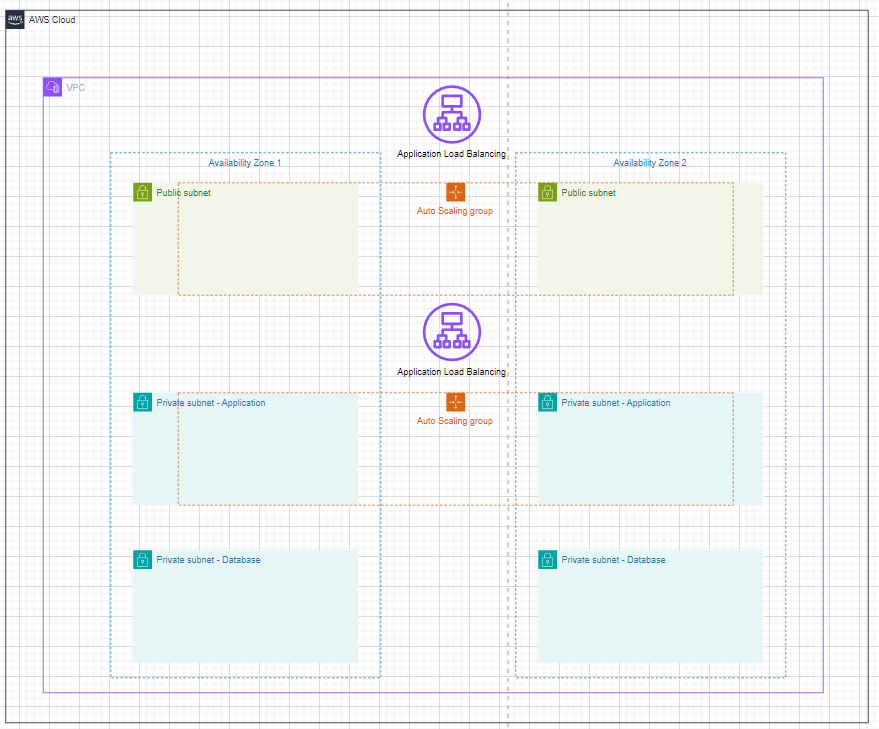
After putting all of the network, we’ll need to put in the ALB and Auto Scaling Group. We need to make sure that the application load balancing between the Auto Scaling Group is well-spaced. We will need to adjust the spacing of the subnets to make it easier to put in the ALBs.
Step 3: AWS Icons — Instances
Now that the groups are set up, we can bring the icons to the page. In this case, we are going to use these services:
- 4x EC2 instances
- 2x RDS instances
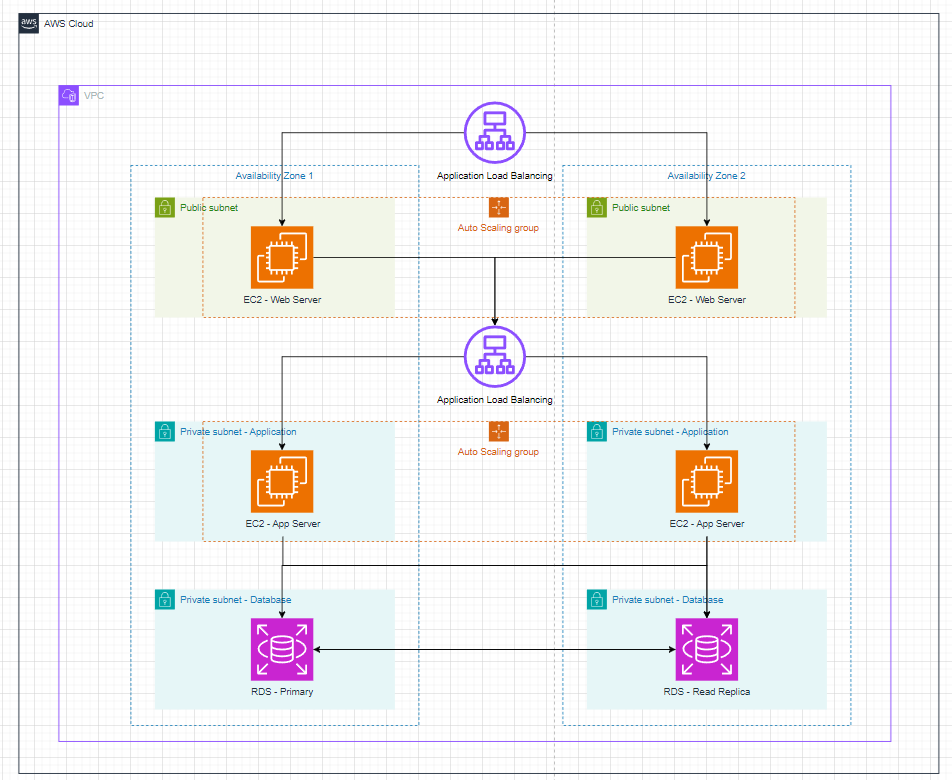
Step 4: Connecting lines between icons
This part is pretty tricky as we could make it very detailed or simple. For my preference, I like it clean and straightforward unless there is a requirement to make it very detailed.
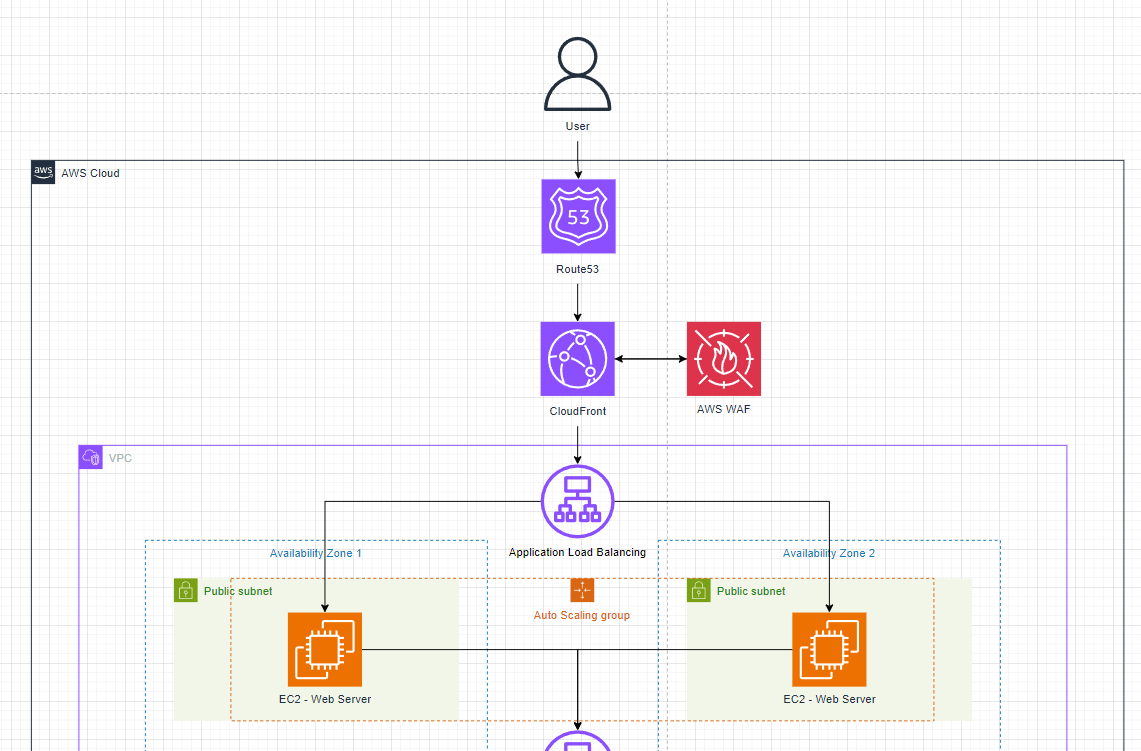
Step 5: Add icons outside of VPC
This pretty much covers all the services needed in the VPC. What we need next is the CDN, Firewall, and DNS:
- 1x CloudFront
- 1x WAF
- 1x Route53
- 1x User Icon
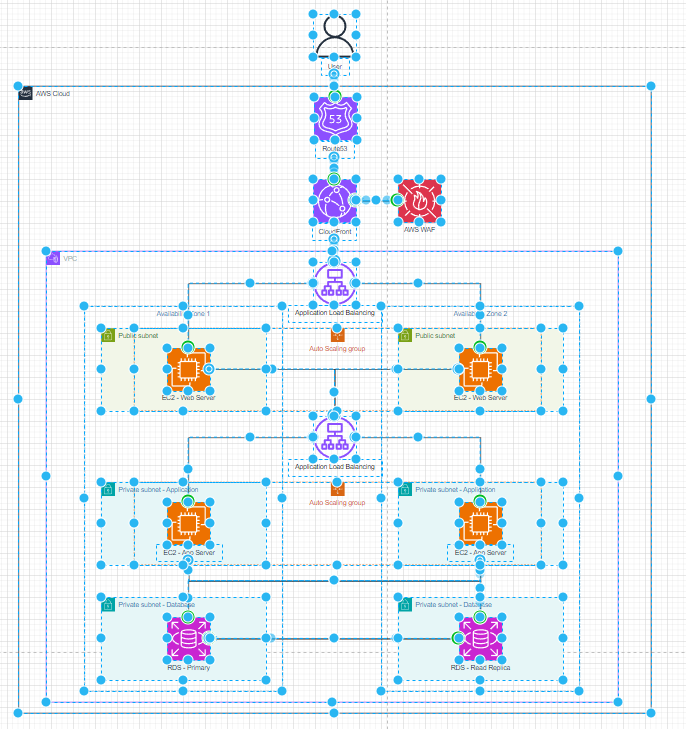
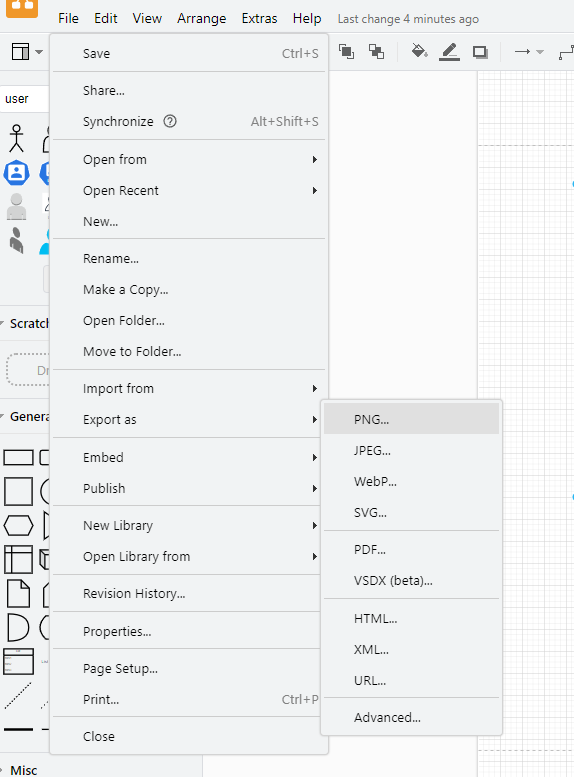
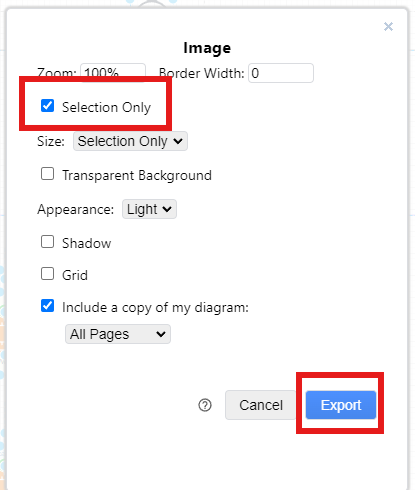
Step 6: Highlight all the icons and export as a PNG
After finalizing all the icons and lines, you can export the architecture as a PNG in the draw.io. Here are the screenshot steps:
Voila! Here is your AWS architecture. It’s not that difficult once you get used to it. Once you get used to it, it shouldn’t be challenging to build it.
Conclusion🍃
In conclusion, building this architecture requires great practice. Any drawing tool will work as long as you can keep drawing and creating more architecture.
“Practice makes perfect.” — Benjamin Franklin
Feel free to put some claps and opinions in the comment section below! 👏
Resources
Written by Reynold Nathaniel Tanton, Cloud Solution Architect, MegazoneCloud Hong Kong


